How to Draw a Simple Jet Plane
This tutorial shows how to draw a fighter jet in six elementary steps with illustrated examples and easy to follow drawing instructions.
The jet in the examples is drawn in 3/iv view as its a dainty angle for showing it'due south shape. Though fighter jets can exist fairly complex and hard to draw this particular tutorial is made specifically for beginners and is fairly easy.
Before you being please annotation that you lot will need to do some erasing between the different steps . To make this easier showtime the cartoon in pencil and brand light lines. You tin darken them when finishing the line drawing.
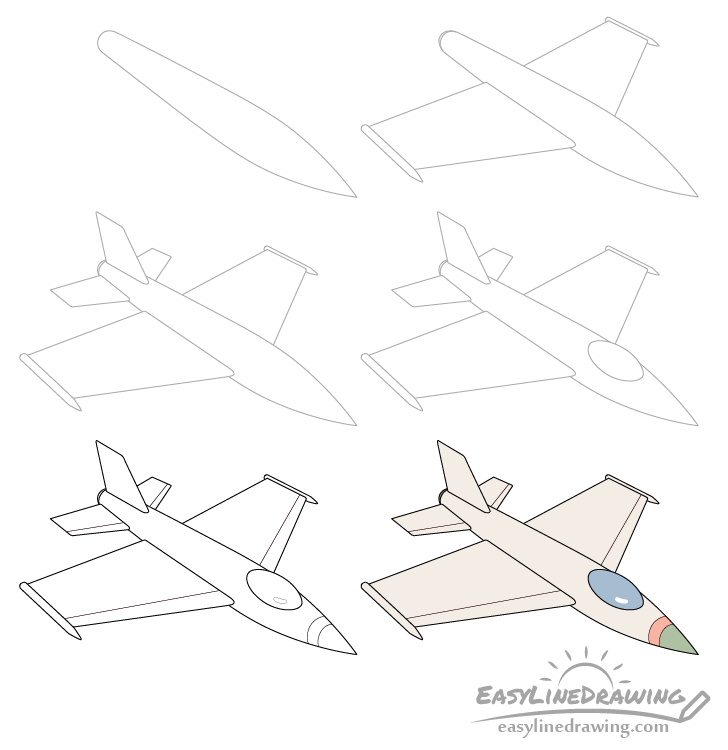
Ste ane – Draw the Trunk of the Fighter Jet
Start past drawing the master trunk of the fighter jet. Brand the nose pointy with the overall shape being wider towards the front end and narrower toward the back.
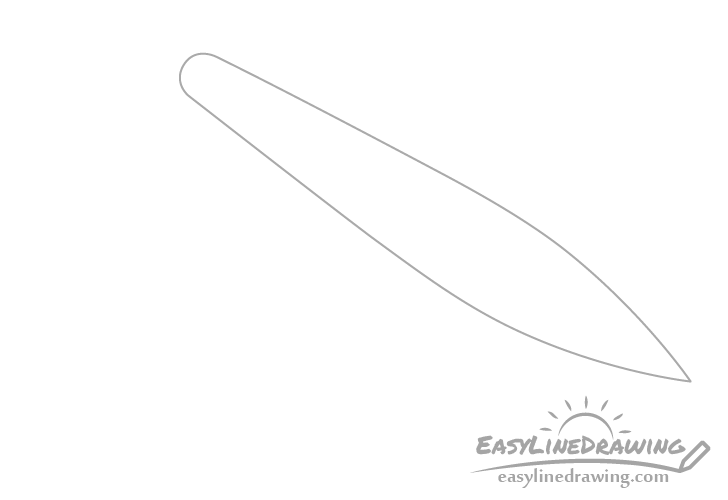
Ste 2 – Draw the Wings
Add together the wings with the one in the front larger and the one in the back smaller. One reason for this is that at this bending part of the background fly will be hidden backside the airplane making information technology appear shorter. The other is that due to perspective objects that are further away volition announced smaller.
When cartoon the front wing add together it overlapping the outline of the main body of the jet and erase the part that should be covered by it later.
When done with the wings you can also add together a tiny hint of the exhaust at the back of the primary trunk. Bear witness it with just a minor bump curve as in the example.
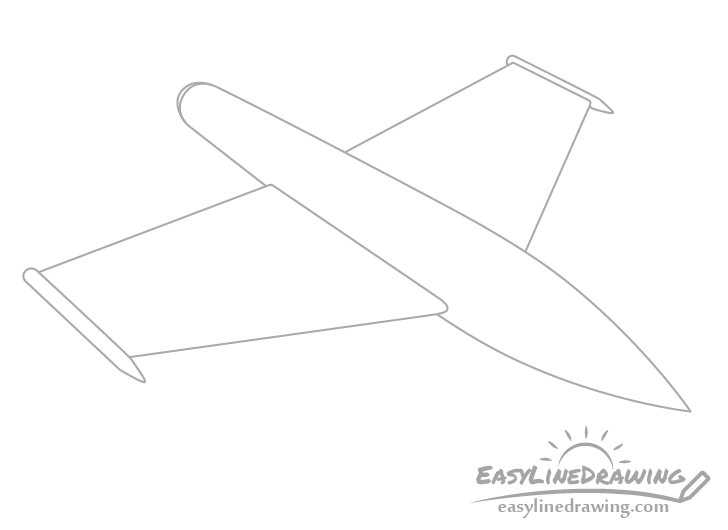
Ste 3 – Draw the Tail
Add together the tail and tail wings of the jet called the horizontal and vertical stabilizers. Draw the horizontal wings/stabilizers similar to the master wings from the previous step. Make the one in the front larger and the ane in the dorsum smaller.
You tin can again describe these over superlative of the primary outline of the plane and erase the parts overlapped by them afterwards.
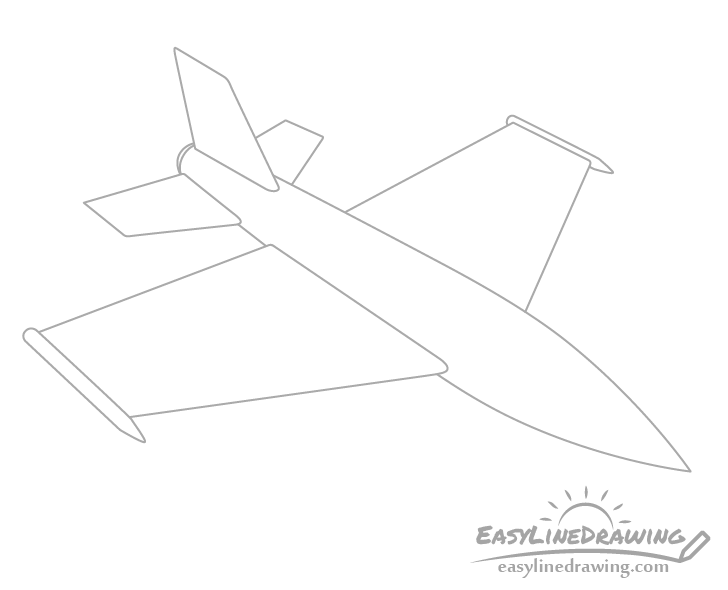
Ste 4 – Draw the Cockpit
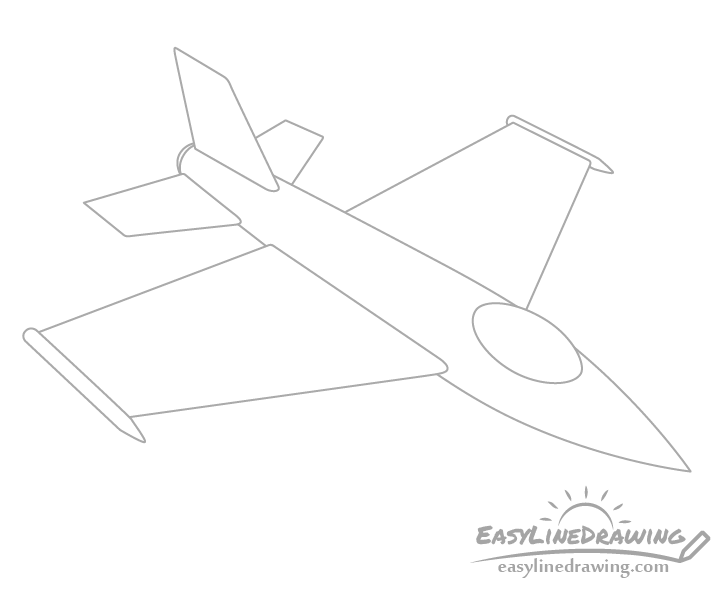
For the last major office of the plane add the the glass covering the cockpit (chosen the canopy). Depict this every bit a fairly long oval towards the front of the jet on the same angle every bit it's main body.
You lot can erase any parts of the torso/wings overlapped by the canopy.
Ste v – End the Line Drawing
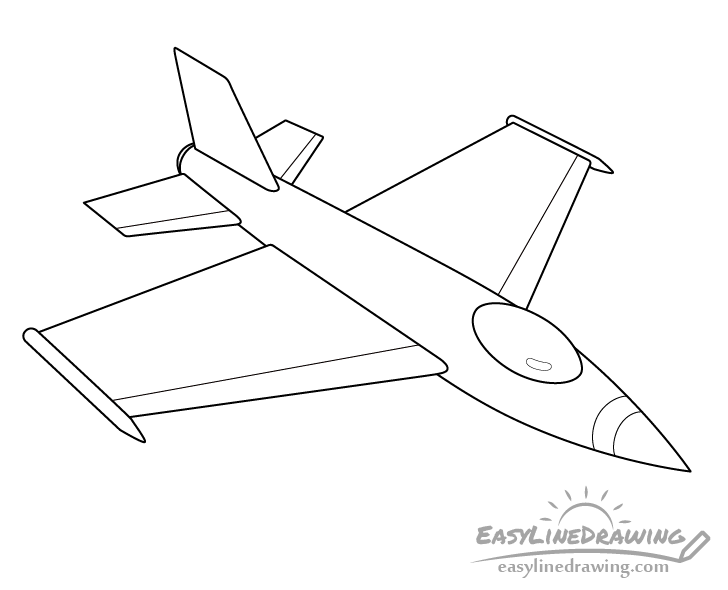
To make the plane look a footling more interesting you can add together some basic details around information technology's wings and nose every bit shown above.
If you are going to colour the cartoon yous can also outline a tiny highlight area on the drinking glass of the awning for the highlight. You can shape this to expect sort of like bean.
One time washed you lot can become over your pencil lines (excluding the highlight outline) with a darker stroke or a blackness pen/marker.
Ste 6 – Colour the Fighter Jet
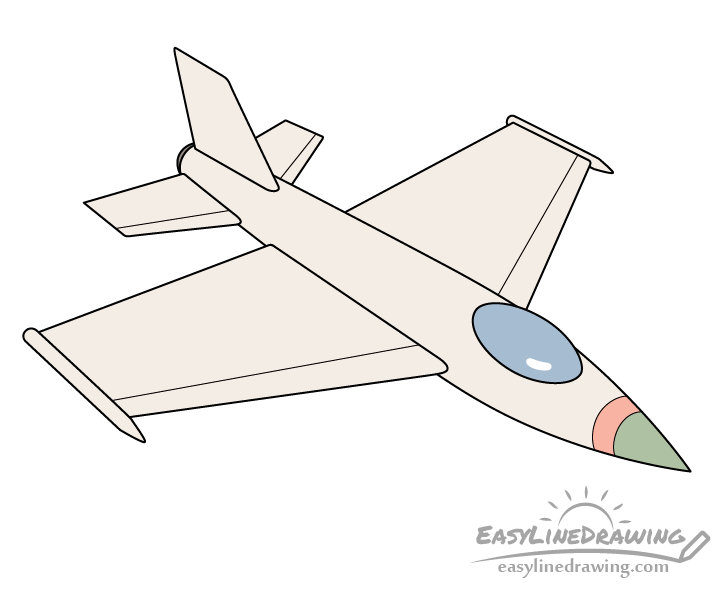
To colour the fighter jet you tin can utilize paints, markers or colored pencils and go with the post-obit colors:
- Lite grayness for the primary trunk/wings
- Blue for the canopy (leave the highlight white)
- Green/red for the nose
You can of course also modify up the colors to something else. For example jets used in air shows tend to have brighter colors while military jets tend to be neutral colors like grey and green.
Decision
Fighter jets can have a lot of complex details making them fairly hard to describe. This tutorial simplifies the procedure by only taking the more than important and characteristic features of one. This hateful that even every bit a beginner you lot tin have a aeroplane that is adequately piece of cake to draw yet still looks like fighter jet.
For more like tutorials also come across:
- How to Depict an Airplane Step past Footstep
- How to Draw a Rocket Step by Step
- How to Draw A Boat Footstep past Pace
- How to Draw a Cartoon Automobile in 12 Steps
- How to Draw a Cloud Footstep by Footstep
- How to Describe a Sword Stride past Step
- How to Draw a Shield Step by Step
Source: https://www.easylinedrawing.com/how-to-draw-a-fighter-jet-step-by-step/
Post a Comment for "How to Draw a Simple Jet Plane"